
Using Symmetry for Next-Level Photography
Wouldn't it be great if there was one weird trick that could guarantee a great photo every time? Sounds like a gimmick that's too good to be true—but symmetry just might be that secret sauce your photos need.
We know how it sounds: "Try this one magic technique for amazing photos!" Yeah, right.
Of course you can't reduce great photography to one infallible piece of advice. But seriously, if we had to name the most simple element of composition that's sure to help improve your photos, symmetry would probably be it.
That being said, making use of symmetry in your compositions isn't as clear-cut as lining up a perfectly symmetrically-balanced shot every time you look through the viewfinder.
That's not always possible, for one thing, and even if it was, we'd all get bored of it pretty fast! Overly symmetrical images can end up feeling a little bit too posed and uninspired. On the other hand, photos with no sense of symmetry at all can easily look scattered and thoughtless.

The visitors to this beautiful library add variety and movement to an otherwise perfectly symmetrical shot.
Photo by Kelly · View Photo
It's something that might not jump out to you right away, but you'll know it when you see it. A poorly-balanced photo will feel forgettable, uneven, while a carefully-composed one just feels right.
The secret to mastering symmetry in photography is to use it wisely, and to know when to go asymmetrical. And with these quick tips and some practice, you'll find it easier and easier to feel this out from behind the lens.
What makes symmetry in photography so appealing?
What is it about symmetry that feels so great? A perfectly balanced, harmonious image tends to feel calming, comforting, the definition of "easy on the eyes." But why?
The natural world around is full of symmetry, from the colorful wings of a butterfly to the petals of a sunflower. Symmetry is a familiar image for the human brain. This likely goes a long way towards explaining not only why people tend to view more symmetrical facial features as more attractive, but also why symmetry in art and photography is so compelling.

Don't you feel like you could stare at this tranquil forest for hours?
Photo by Nancy Guth · View Photo
Not only does symmetry remind us, on a basic instinctual level, of how nature is arranged—it also offers a moment of organization and order in a busy, chaotic world.
In short, symmetrical compositions in photography tend to feel pleasing to the eye, whether they're capturing nature or a human-made symmetry.
How to create symmetry in photography
There are three different kinds of symmetry you can use to create beautiful photos: horizontal, vertical, and radial. All three types can frequently be found both in nature and in human structures.
Horizontal symmetry
Horizontal symmetry occurs when the top and bottom sides of an image are equally balanced and mirror each other. It can easily be found in reflections in water. Architecture often offers chances for horizontally symmetrical snaps as well.
You can make the most of horizontal symmetry in your shots by thinking about the rule of thirds. Symmetry doesn't have to fall strictly along the center line of a photo. You can also create a slightly more unique feel by positioning the center line of symmetry along one of the thirds lines, using your grid while shooting or by careful cropping during the editing process.

Foggy mountains reflected in water create a mesmerizing effect in this horizontally symmetrical capture.
Photo by Krivec Ales · View Photo
Vertical symmetry
Vertical symmetry is created when the left and right sides of an image reflect each other. You can find vertical symmetry in anything from trees to radio towers, and even in portraits. Like horizontal symmetry, it adds a neatly composed feel to any photo.

A simple yet powerful example of vertical symmetry.
Photo by Ryutaro Tsukata · View Photo
Radial symmetry
Radial symmetry is often overlooked as a category of symmetry. It's the effect that occurs when the image is balanced around a central point, creating a harmonious feel that comes with a built-in leading line to draw the eye to the focal point of the picture.
Like vertical and horizontal symmetry, radial symmetry can be found all throughout nature, from the round shells of snails to the arrangement of flower petals.
When we work with vertical and horizontal symmetry, oftentimes the full image isn't 100% symmetrical. The symmetry might only occur along one of the axes. With radial symmetry, there's more of a sense of total harmony and balance, which works to create very compelling photos.

Spiral staircases are a perfect example of radial symmetry in action in architecture.
Photo by Jimmy Chan · View Photo
How to add symmetry to your photos
Symmetry can be found (and created!) anywhere, whether you're shooting in the studio or on a hike. Here are a few ideas to get you started on adding symmetry to your compositions.
Capture a reflection in water
A classic way to incorporate true symmetry into your photos, water offers a picturesque opportunity for horizontal symmetry. Shooting at a lake, river, or seaside view will usually offer great results, but you can also get creative and find water elsewhere: try shooting the reflection in a pool, bathtub, or even a puddle.

These vibrant fall leaves reflected in water create a symmetrical image with a classic feel.
Photo by Harrison Haines · View Photo

Getting up close to a puddle in the road allows this photographer to create a nicely symmetrical street scene.
Photo by Paweł L. · View Photo
Bring a mirror to your shoot
Mirrors are a great easy tool to create reflections in your images. Get close up to capture the reflection in the glass, or zoom out to include the mirror as a frame within your composition.

This reflected portrait makes use of vertical symmetry for a compelling result.
Photo by Eric Torres · View Photo
Find the symmetry in architecture
Take a walk down any street and you're guaranteed to find lots of opportunities for vertically symmetrical compositions, from skyscraping office towers to family homes. Look for the balance in elements such as windows, doors, decorations and signs.

The curtain on the front door of this picturesque building lends an asymmetrical touch to an otherwise perfectly balanced image.
Photo by Marie Lemaistre · View Photo

This photographer advantage of the neat symmetry of an apartment building for a tidy image.
Photo by Alexander Zvir · View Photo
Try a nature shoot
You don't need to venture far to try out nature photography—your own backyard or a local park will have ample example of symmetry in action. Focusing on the interplay between human elements such as lamp posts and benches, and their natural surroundings, is a great way to bring interest into your image.
The fine details of leaves, flowers, even insects can all make for great symmetrical compositions as well. This would be a fun time to experiment with macro shots to really hone in on the natural symmetry of these subjects. Or go wide and focus on the balance created by a natural scene.

This photo captures an unexpected and beautiful symmetry between the tree's branches and its roots.
Photo by Felix Mittermeier · View Photo

An extreme close-up on a lush green leaf creates a perfectly symmetrical shot with a painterly feeling.
Photo by Pavlo · View Photo
Use symmetry to guide the eye
While perfectly symmetrical captures can definitely be satisfying, the most exciting uses of symmetry in photography tend to use that balance to direct the viewer's gaze to a subject within the frame.
Street photography offers a great chance to do this. In the examples below, the photographer uses the symmetry of the scene to guide our eyes towards a human subject, highlighting the contrast of size between the buildings and the people walking around them. Symmetry can help create effective leading lines to really bring out the important details of your image.
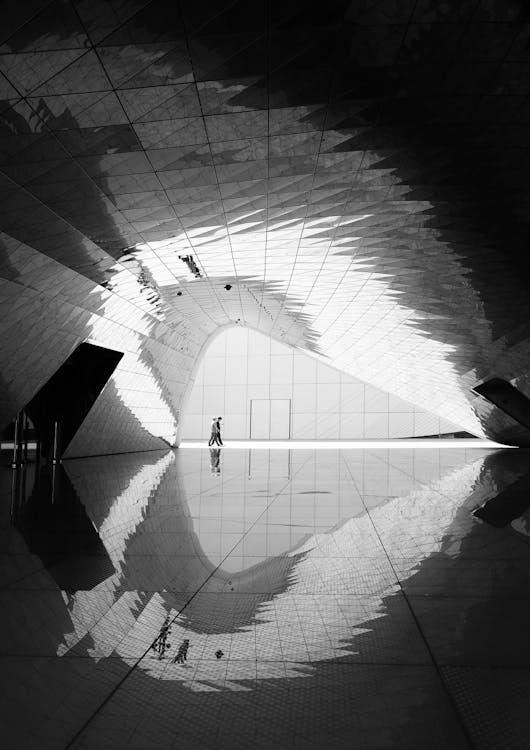
The reflection in this captivating image draws our gaze towards the walking figures.
Photo by BERK OZDEMIR · View Photo
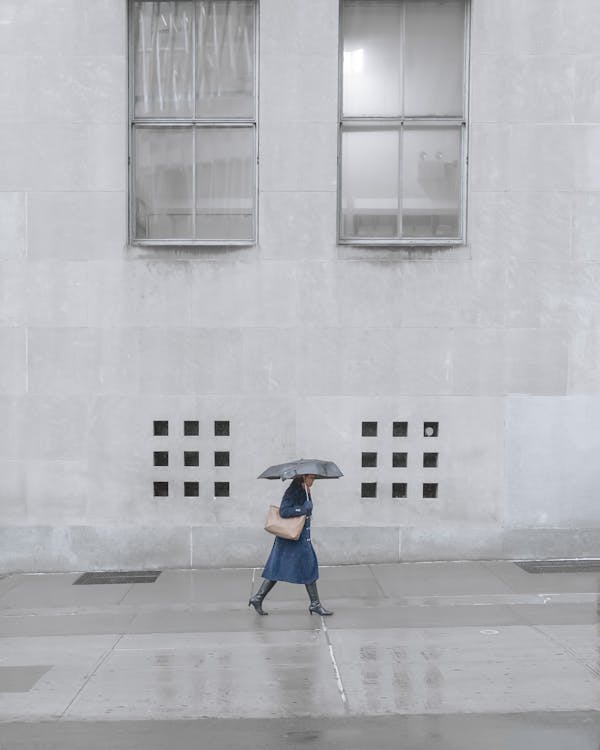
Framing this figure with the symmetrical details of the grey building creates a dynamic composition.
Photo by Antonio Dillard · View Photo
Perfect versus imperfect symmetry
A final note on making use of symmetry in your photography: a perfectly symmetrical image creates a very different feeling than an imperfect one. It might be tricky to achieve a truly symmetrical image without a bit of help from Photoshop, but it can be done, especially if you're working with a reflection.
Perfect symmetry can have a slightly surreal feeling. It's captivating, but you'll need to be thoughtful when using it or the resulting image might simply feel too perfect. The key here is to add an element of asymmetry—just a tiny one. Perhaps one side of the image is slightly darker than the other, or the colors are slightly different. Adding a bit of edge helps keep the eye engaged and your photo feeling real, not fake.
"Imperfect" symmetry can often feel even more satisfying to the eye than perfect symmetry. In the examples below, the photographer makes excellent use of different symmetries, playing with the elements of the photo to tell a story.
As you start to be on the lookout for symmetry in your photos, you'll find more opportunities to make creative use of balance to achieve a unique effect.
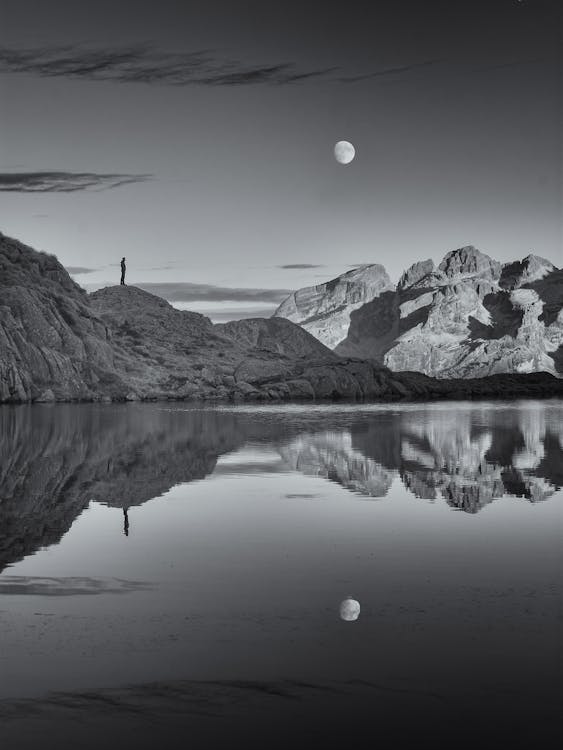
The perfect horizontal symmetry of this black-and-white shot is offset by the nicely balanced moon and standing figure.
Photo by Gianluca Grisenti · View Photo

Making use of both radial and vertical symmetry, this image of the London Tube is full of interesting detail and texture.
Photo by Naveen Annam · View Photo
Cover photo by Yaroslav Shuraev.
Pexels is a platform for high quality stock photos you can use for free.
Browse free photos


