What is Shutter Speed: An Easy Introduction
Understanding how shutter speed works is key to creating great photos.
Along with ISO and aperture, shutter speed is one of the three most important camera settings to understand.
The way shutter speed works is simple. The camera shutter is the cover that keeps light from entering your camera when you aren't taking a photo. When you press the button to snap a shot, you're activating the shutter. It opens up for a certain length of time, allowing a little or a lot of light to reach the camera sensor. Then it closes, and boom, you've got your photo!
Shutter speed refers to how quickly the shutter closes. It can be open for just a tiny fraction of a second, or it can stay open for minutes (or even longer!). But the most typical shutter speeds tend to be between 1/500 of a second and up to 30 seconds.
Why shutter speed is important
If you're shooting in a very dark setting, you want as much light as possible to enter the camera, or else your image will be too dark to see. This means you'll typically want your shutter opened up for as long as possible.
If you're shooting outside on a bright day, leaving your shutter open for a long time means that too much light will flood into the camera, and your image will likely be over-exposed and washed out. In this case, it's preferable to have the shutter snap open and shut fairly fast, allowing just enough light to expose your photo.
As we mentioned above, shutter speed is one of the most important camera settings—it works in tandem with ISO and aperture to create a perfectly-exposed photo. Shutter speed is a crucial tool for making sure your image isn't too dark or too bright, but instead is just right.
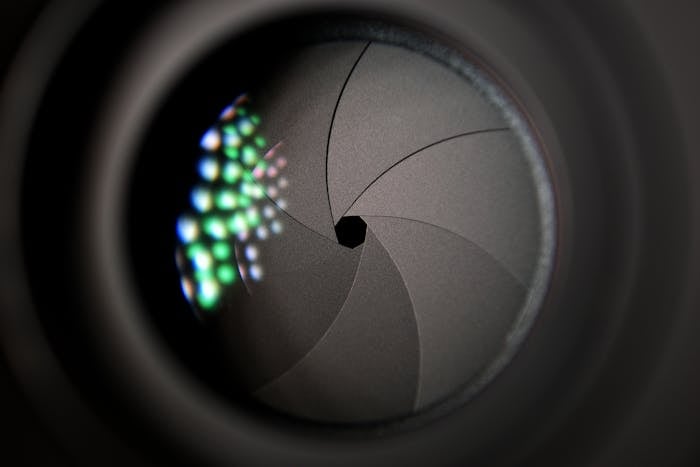
A close-up view of a typical shutter.
Photo by Pixabay · View Photo
Shutter speed and motion blur
Shutter speed also serves another useful purpose: capturing the motion in your photo (this can mean creating motion blur, or avoiding it).
Think about it: the longer your shutter stays open, the longer your camera is "looking" at the scene in front of it.
If you point your lens at a fast-flowing waterfall for 0.005 seconds, your camera only sees that fraction of a second of the water in motion, and the result is an image where the water appears frozen in place at that quick moment in time. But if your shutter stays open recording the motion of the waterfall for two whole seconds, you'll end up with a photo where the water is a blur of all the motion that occurred over those seconds.
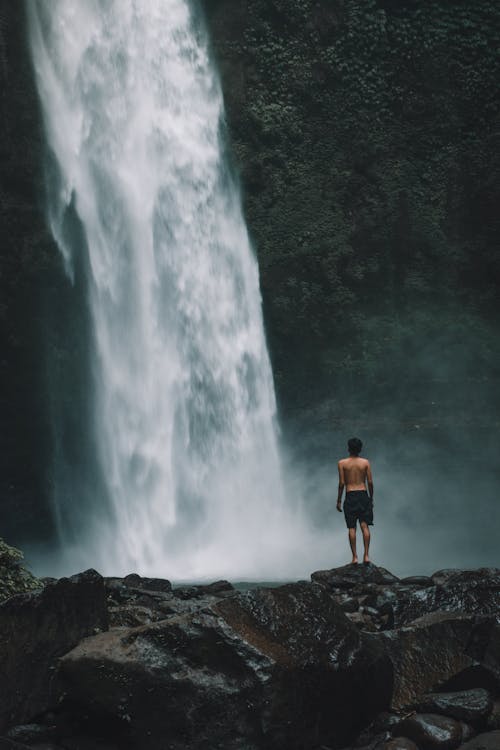
This photo uses a shutter speed of 1/80 with a 35mm lens to reveal more detail of the water.
Photo by Alex Azabache · View Photo
How to make use of motion blur
While an image with frozen motion may look more immediately realistic, the motion blur created by a longer exposure is technically adding more information to the image.
Instead of the waterfall in a split second, we see the waterfall over several seconds, and maybe we get more of a feeling for what it's like to stand in front of the waterfall and enjoy the scene in real life.
A blurred image tends to feel more impressionistic, a la the movement in painting where artists sought to create pictures that captured how a moment in time really felt, as opposed to an exactly realistic portrayal.

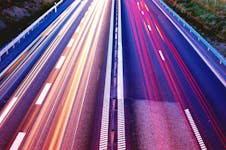
A 15 second-long exposure and 30mm lens capture the moving lights of traffic in this urban shot.
Photo by Joey Kyber · View Photo
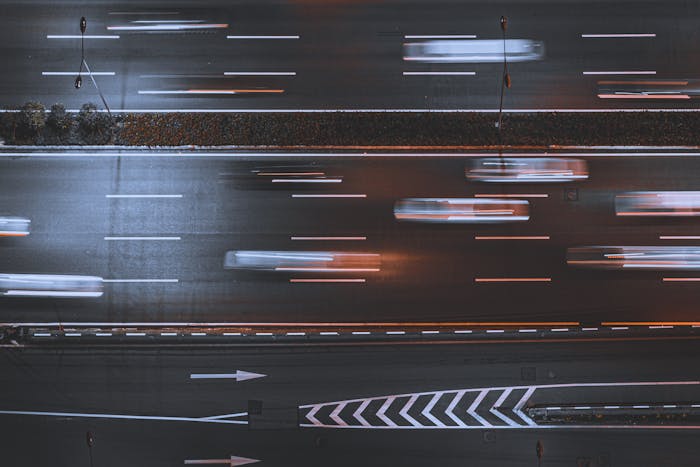
Here, a 0.5 second exposure with a 60mm lens shows more detail (you can still see each separate car) while still achieving a blurred effect.
Photo by Ruiyang Zhang · View Photo
Ultimately, adding motion blur to your imagery or opting to aim for a focused and clear image is up to you. There's really no right or wrong way to depict motion in a photo. You might decide to create dreamy, artistic effects with tons of motion blur, or you might prefer to challenge yourself to capture a speedy subject in perfect focus.
The motion blur that can come with longer shutter speeds often gives a more creative, even slightly surreal effect, which can work well for landscape photography and street photography, for example. Long shutter speeds are ideal for light trails, whether from stars or traffic.
If you're shooting sports, wildlife, or automotive photography, you'll likely want to go for a short exposure to create a sharp image where the blur is in the background and the subject in motion appears sharp and clear.
To recap: as we saw from the waterfall shots, a longer shutter speed is great for capturing motion over time for a creative effect, while a shorter shutter speed can pause motion in place for a focused shot.
How to set the correct shutter speed
Now on to the important stuff. We've covered how shutter speed works and the different effects that you can achieve with long and short exposures in different settings. So let's get to the details: how can you make sure you're using the most optimal shutter speed for the shot you want?
When you're shooting on automatic mode, the camera sets the shutter speed for you based on the conditions you're shooting in. But in order to really create the perfect shot, shooting in manual is a good option for more control over your final image. You'll need to switch into manual or a semi-manual mode in order to adjust shutter speed yourself.
Shooting in shutter priority mode
One way to ease into shooting fully manual is to try out shutter priority mode. On Nikon and Sony cameras, for example, this is represented by an "S" on your camera dial. Canon cameras use Time Value for this mode and it's denoted by a "TV". It may be slightly different depending on your camera brand.
When you shoot in shutter priority, you set the shutter speed you want, and the camera essentially does the rest! Aperture and ISO will be automatically adjusted to ensure an accurate exposure.
Shutter priority mode is a good option for times when you're really focused on capturing motion and don't need too much creative control over other elements of the shot. Shooting in shutter priority can also help you avoid camera shake at when you're working with longer exposure times.
For those super long time lapse exposures beyond 30 seconds, you will often need to switch into what's typically called Bulb mode. This will let you time your exposure to be as long as you want—the shutter will simply open and stay that way until you click again to close it. This mode combined with a sturdy tripod can allow you to achieve incredible star trail photos, for example.
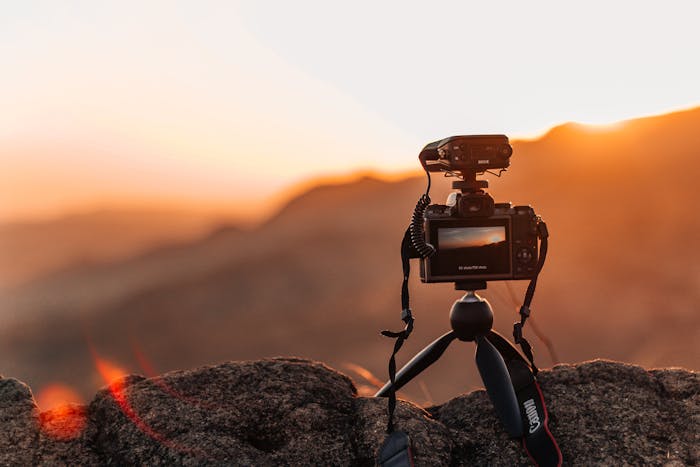
Using a tripod is essential for perfect long exposures.
Photo by Luis Quintero · View Photo
Choosing the right shutter speed for your shot
If you're ready to get more creative and take control of your shots, you can try switching into full manual mode and adjusting shutter speed yourself. Luckily, there is a basic rule of thumb you can use to get started. In general, shutter speed should be higher than the focal length of your lens. So if you're shooting with a 50mm lens, the minimum shutter speed would ideally be 1/50.
If you're using a tripod, this doesn't apply—you can use a wide range of shutter speeds safely in that case. But without a tripod, using a lower speed may result in unintended blur and shakiness. If you want to do very long exposures, for example to shoot light trails, you'll need a tripod to keep the camera steady for those several seconds of exposure.
Once you're shooting in manual, you can try out different shutter speeds to see the results. Get creative and play around; don't worry if you get a lot of blurry shots at first. This practice will help you better understand which shutter speeds work in the environment you're in, and which don't.
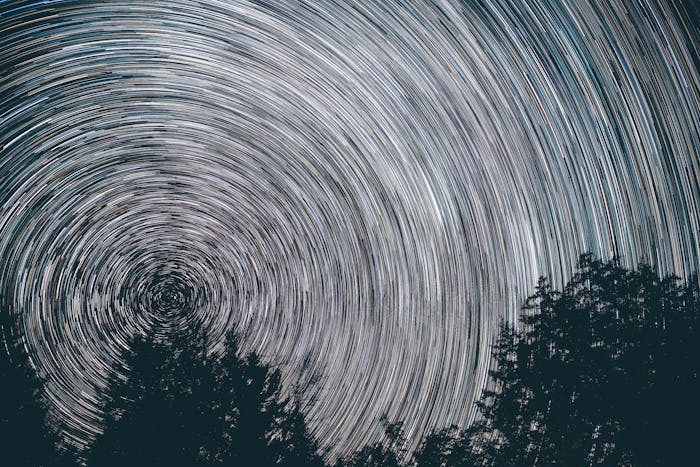
This stunning star trail image was made with a 30 second-long shutter speed and a 24mm lens.
Photo by Harrison Haines · View Photo
Shutter speed examples
Here we'll go over some typical examples of shutter speeds to use for different settings. This is just a general guideline to help you get started. The shutter speed that works for you will depend on the specific scene you're shooting.
- Stars: at least 30 seconds and even longer
- Water in motion: 1/10 up to 2 seconds
- People walking: 1/125
- Sports: 1/1000
- Cars/vehicles: 1/800
Go out there and get creative! Try some fun long exposure ideas like light painting or star trails, or experiment with surf photography or capturing birds in flight. Now that you understand shutter speed, there's so much more you can do with your camera.
Cover photo by Jonathan Petersson.
Pexels is a platform for high quality stock photos you can use for free.
Browse free photos